|
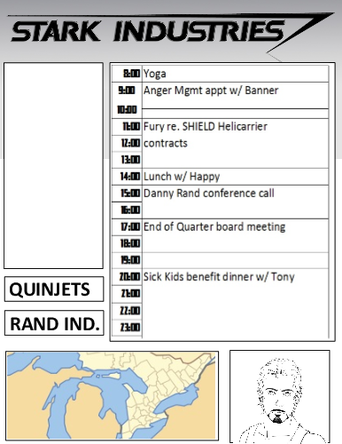
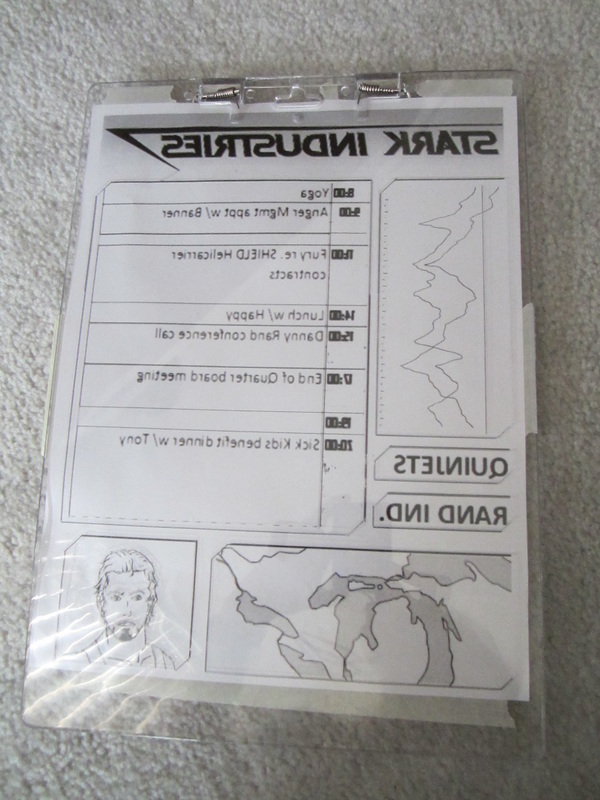
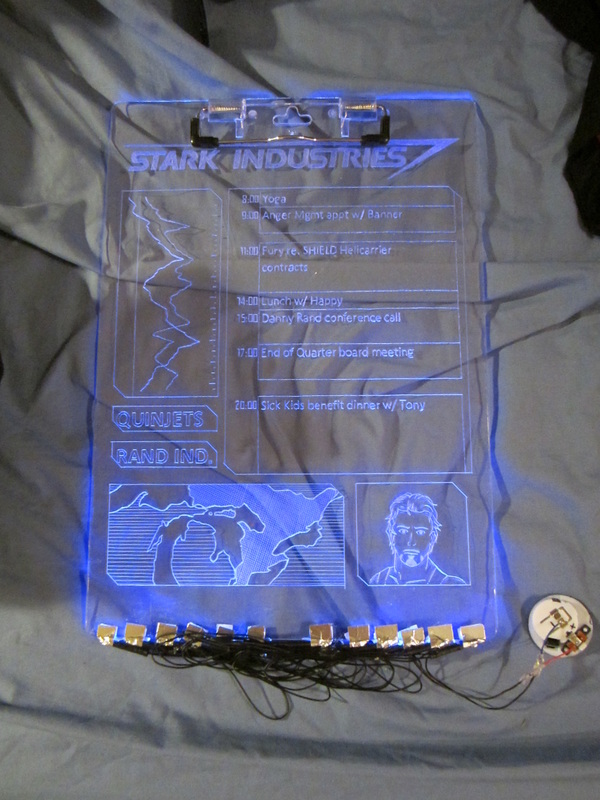
Welcome to a new feature from Mai Sheri Costumes: Tutorial Tuesdays! I don't know how often these will be posted, but I'm looking at once a month for now - it depends on what people ask me about and how much writing time I have available. I post lots of progress photos of my work, but occasionally I get asked for a more detailed description of how I made something, and I decided to turn the answers to those questions into proper write-ups! Take Note: this tutorial is not necessarily the "right way" to do things, nor the "best way", but is simply how I went about it when I made my own. Anyways, on to the project! 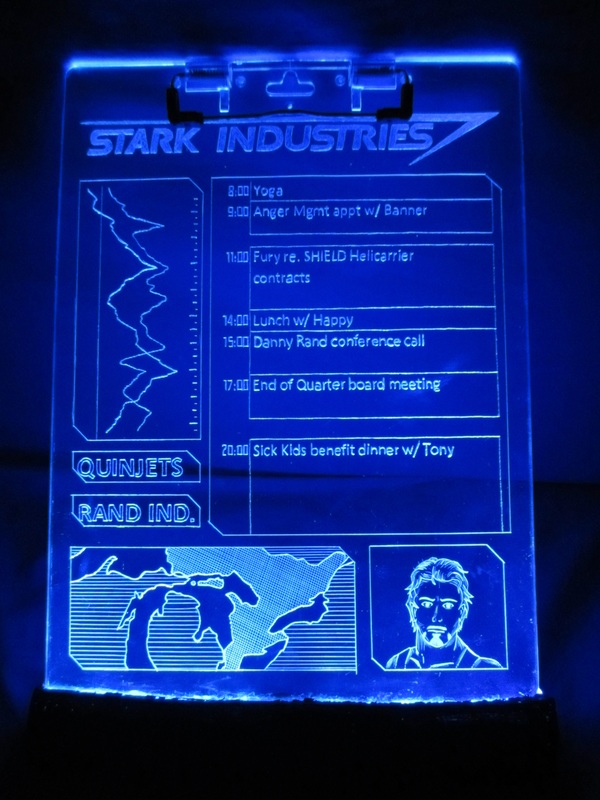 The Project: The first time I wore my Pepper Potts outfit to a con, I wanted to have a prop which would help identify myself as the character, and since I was going to be spending the day working backstage at the fashion show, I figured I would make something practical. I had seen other Pepper cosplayers carrying "Stark pads" at various other conventions, so I decided to try to make my own, but using an actual clipboard instead of plain piece of acrylic plastic. The designs are etched into the back side of the plastic, and a large piece of foam on the bottom conceals a string of LED's and the battery/switch. The design itself is based loosely on the screens shown at Stark Tower in The Avengers. 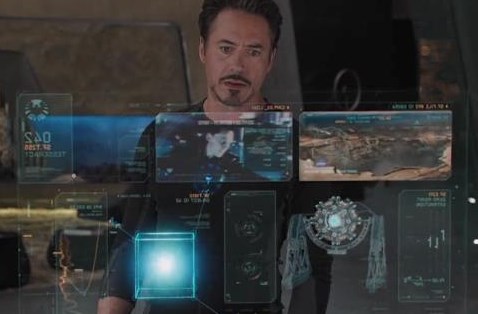 Just look at all those lovely little windows with their clipped corners! This is both a low-budget and low-technical-knowledge project, though it can take a lot of patience depending on how much engraving you want to do.
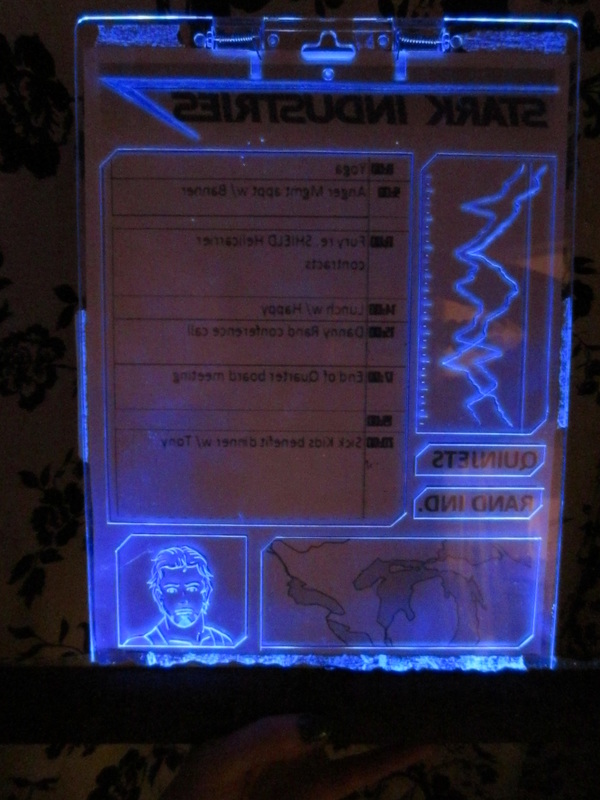
Lights Part 1: Before I started to permanently carve into my clipboard, I needed to check to see that what I had on hand was actually going to work. I didn't go out and buy any electronics for this project - it was all stuff I already had at home; leftovers from a party. The main component was a sting of 12 blue battery-powered LED's, from which I removed decorative plastic dragonflies. I didn't want to have to cut apart lights which were already wired properly just to try to solder them all together again, so I hoped that resting them against the edge of the clipboard would transmit enough light. The LED's fit quite well along the bottom edge, but it was clear that the battery pack was far too bulky to use. We'll come back to that later. 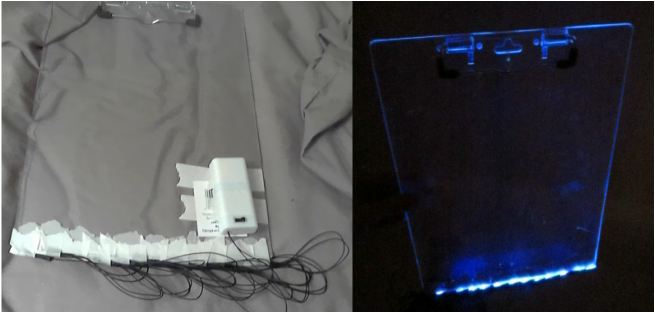 Success - the light makes it up to the top edge! Design: Decide what you want to put on your display - don't get too complicated or the engraving will be exhausting, and keep in mind that shading or depth of colour is extremely limited when working with light. I went with the company name/logo (of course), and open "apps" for Science™, schedule, "local" map, and a pic of Tony. I got Ragz Cosplay to give me a hand with some of the references since the movies didn't give me enough characters to work with (and comic book history terrifies me). I put it all together on the computer for nice neat fonts, and printed it out mirrored since I was going to to be engraving from the back. This is important - you want to engrave on the back to keep the front surface smooth, so the design you're tracing HAS TO BE MIRRORED. Once it's printed, put it face-down on the front of the clipboard (so you can see the design from the back) and use masking tape to hold it in place. Leave room for where the lights will be attached.
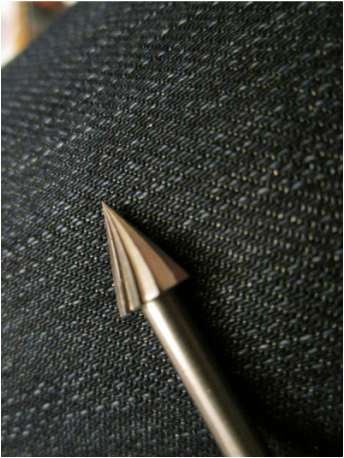
Engraving: If at all possible, do a test before starting the engraving - every little nick, scratch, and scuff on the surface of the plastic will light up once it's done, so avoiding mistakes is crucial. I tested on a couple spots under the clip, but it could also be done where the lights will eventually cover, or you could even get a second clipboard for testing. Then it's just a matter of tracing your design by scratching into the plastic. I started with a craft knife and a metal ruler for all the app outlines and other straight edges. It gives a nice, fine line.... and trying to use a Dremel with a ruler is asking for trouble. Most of the etching on Tony's picture was also done with the knife. For just about everything else, I busted out the Dremel. Now, I was borrowing the tool and bits from a friend, so I honestly don't know if the bit I was using was actually for engraving, but it had the sharpest point, and ended up working out just fine. It took a little practice to figure out the best combination of rotation speed, angle, and pressure, which is why I started with the graph area - if I messed that up it mattered the least!
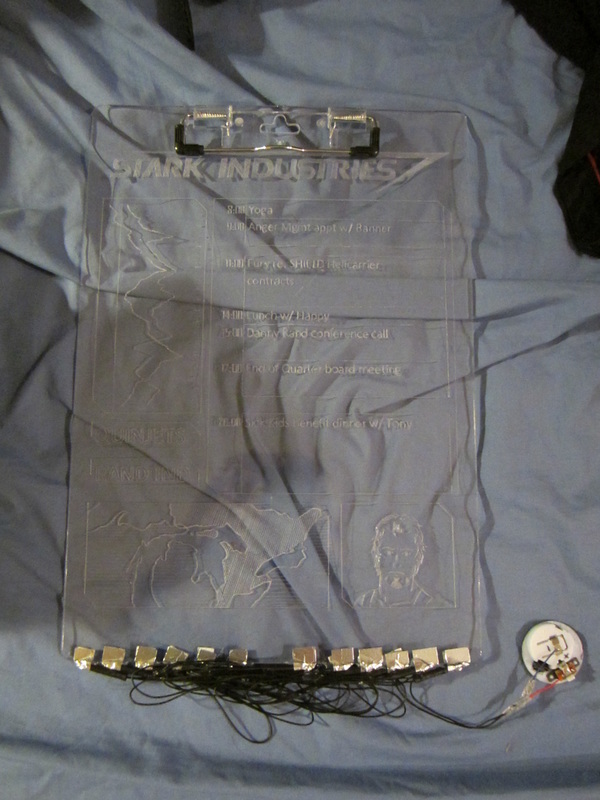
Be Patient. I had to limit the time I spent on this to about 30 min per day, to prevent myself from destroying my wrist with the weight of the Dremel. It's a lot of tedious work and these tools aren't light, so take that into account if you want to have clean, professional-looking results... without injury >_> You'll notice in the photo below I have a piece of plumbing insulation foam over the bottom - that was to protect the lights so that I could keep them attached while engraving. It's good to be able to check that what you're doing is actually working! 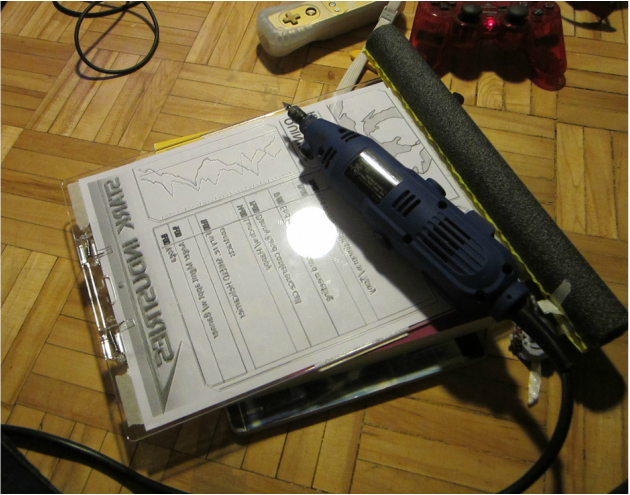 OMG this took forever! I had to switch back to using my handy craft knife when it came to the map. I did the outlines with the Dremel, but needed a way to differentiate Canada, USA, and the Great Lakes. Fortunately, crosshatching worked out! I used a ruler to make sure that the lines were as even as possible while still working by hand, but I also masked off the lakes with tape to help prevent any accidental colouring outside the lines ~_^ 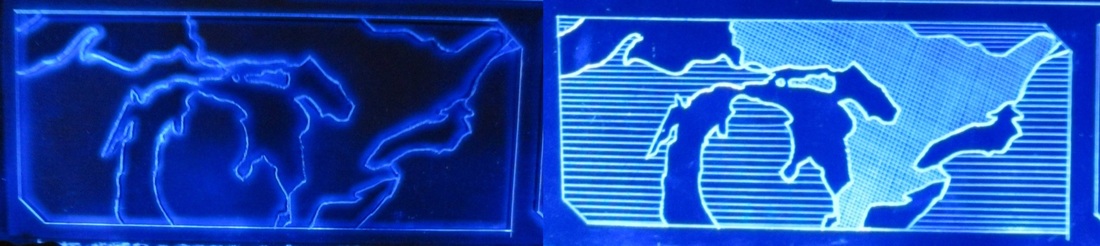 Colouring with monochrome light Lights Part 2: Now, as for that huge battery pack... also among the leftover decorations from that party were electric tea lights, and I noticed that the voltage on them was the same as my string of lights. So I broke open a tea light (hooray for cheaply made goods), and separated the bottom piece with the battery holder and on/off switch from the actual light. I marked the positive and negative wires (just in case!) and cut the wires from both the tea light and strung lights. I got a friend to help me solder the strung lights to the battery/switch, but I would have been just fine doing it with electrical tape. You will want to re-arrange the LED's to shine into the clipboard as much as possible, while also minimizing the bulk of excess wire. Because the light bulbs themselves would be facing sideways instead of directly into the plastic, I used aluminium tape wrapped around as much of the bulb as possible to attach them to the plastic. The tape makes sure that light is reflected into the plastic (where you want it); and the less light lost, the brighter your clipboard will be.
Get A Grip: The last thing to do is cover up all that wiring and have something to attach the battery to, so it's time to make the grip. At first I was going to just trim down the pipe insulation that I was using earlier, but it was far too bulky. If I were to re-do this now, I would try to make the grip much slimmer, maybe use craft foam and a thermoplastic, but at the time a piece of pool noodle was what I had handy. I cut it into a mostly rectangular block with a slot cut lengthwise, just a touch wider than the clipboard. The curved exterior part of the noodle is at the front, and the back is cut (relatively) flat. I also cut a hole in the back for the battery pack so that it would sit flush with the rest of the grip. I used hot glue to attach the grip to the clipboard over the lights. I sealed the foam with my usual method: Flexbond and black acrylic paint, the same way I seal and paint craft foam projects. I coloured the white plastic battery case black to match the grip and then glued it into place! 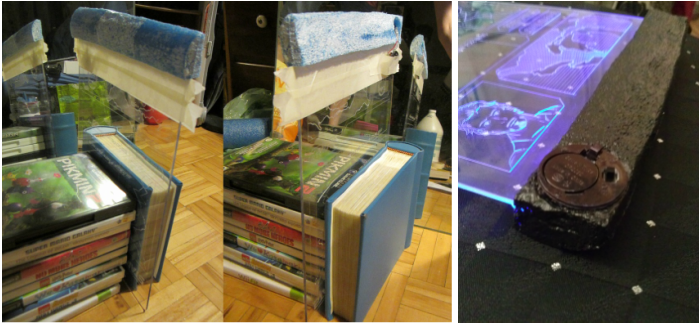 Creative solutions are called for when coating things with slow-drying adhesives. And there you have it - a functional light up clipboard with accessible battery and on/off switch, and for less than $15* and an absolute minimum of electronics work. Keep some fresh batteries on hand to keep it bright - also available at dollar stores! Other parting tips: Be very careful not to scratch the surface - every mark will catch the light and show up. Avoid wearing jewelry on your hands and wrists while working on it, and watch out for buttons. I wrap my clipboard in a soft cloth when I pack it to avoid damage from travel. From a design standpoint, consider that things closer to the lights tend to glow brighter, and the more etching there is close to the lights, the less further areas might glow. On mine, "Stark Industries" wasn't nearly as bright after I added the map. If you are interested in getting a better handle on how to do this stuff properly, I referenced two tutorials while figuring out how to make my clipboard. Unfortunately it seems that the one focusing on etching methods is no longer online (try searching for DIY acrylic etching?), but this Edge Lit Displays Instructable is still up and very informative! Since I've been asked about this clipboard many times recently, I hope some of you found this helpful! If you make your own, please send me photos, I'd love to see them! 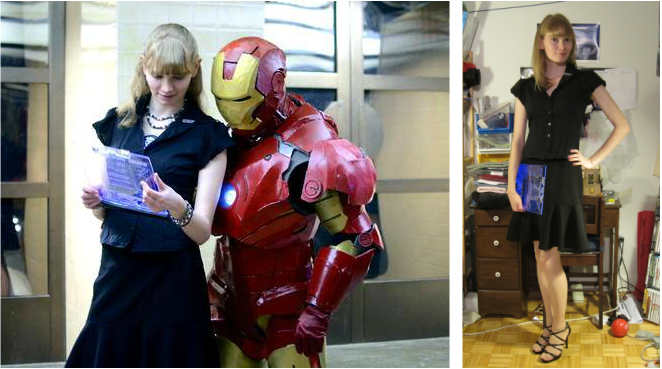 Much tech. So glow. Wow. *not including the cost of Flexbond. I hear Mod Podge is a reasonable substitute.
0 Comments
Leave a Reply. |
Archives
March 2024
Categories
All
|
 RSS Feed
